Knitting a Hat with a Motif: Intarsia in the Round
Knitting intarsia is a somewhat complicated method of knitting an image into a larger piece. Knitting intarsia while also working in-the-round adds another layer of confusion. Some resources claim intarsia in the round is impossible, requiring many cuts in the yarn for each row. Yet, something tells me it can be done.
I found a pattern for a Minecraft creeper hat on Ravelry that mentions intarsia in the round. Several others who have attempted the provided pattern mention that the instructions are unclear. I’m going to reengineer the pattern, with a clear explanation of intarsia in the round as I go.
Thought Experiment: Yarn Path in the Pattern
To start, this will be a hat knitted in the round. My explanation assumes that you understand the difference between knitting flat (where there is a right side / wrong side) and knitting in the round (where you are always on the right side). Ideally, you’ve done at least one piece each way. I also assume that cutting yarn is blasphemous. My goal is to have as few cuts as possible (without doing anything tricky like carrying one color behind the other for tons of stitches). Note: MC means “main color” (green) and CC means “contrasting color” (black).
I start with a printout of the motif and try to draw a continuous yarn path over the pattern (Figure 1). Like a typical pattern, yarn starts in the bottom right. The MC yarn move forward 3 stitches on the first row of the motif and then connects to the second row, where the yarn will have to be knit in reverse (moving to the right on the right side). The yarn continues around the back of the piece, connecting the blue 1’s in the image. By the time the yarn has gone around (coming in from the left) it is back on row 1 of the motif. This assumes that the seam (where the second row started) is on the back of the piece and the motif is in the front.
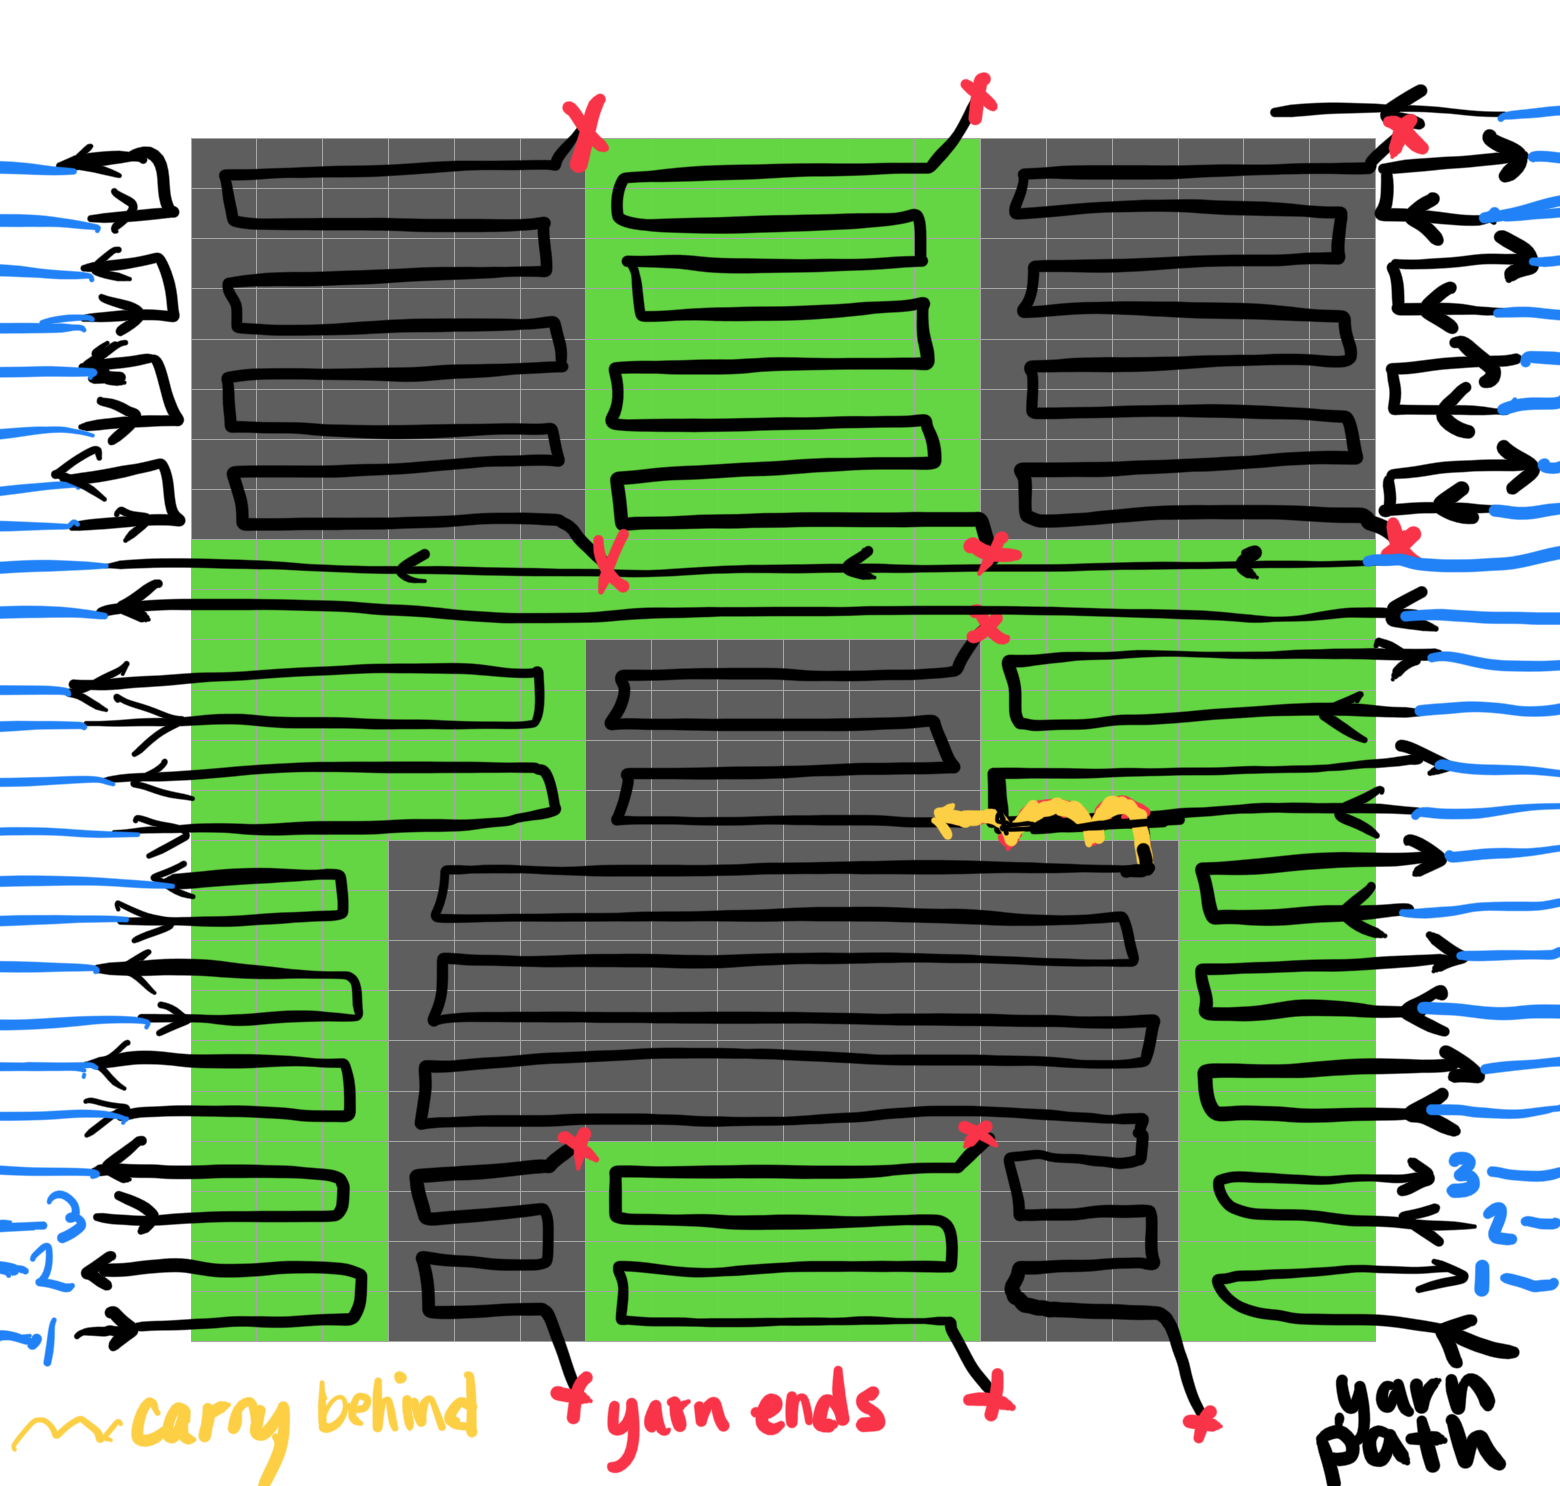 Figure 1: Knitting path
To figure out how many yarn strands I need I look at each row. Start on row one: there are 4 sections of color: 2 green, 2 black (the right side and left side of the image are connected, creating a single green block). Thus, I need 4 separate strands of yarn, 2 green, 2 black. Each skein is a single strand, so I’ll have to create 2 bobbins by pre-cutting lengths from them.
From my yarn path image, I can create a block drawing (Figure 2). Each block in the image is knit with a separate, but continuous, strand of yarn. Remember that this pattern sits within a knitted-in-the-round piece, so the unmarked green is the regular knitting, coming from the MC skein. Also, note how each block contains an even number of rows. This allows the main MC strand of yarn to be continuous throughout the motif (it never needs to be cut).
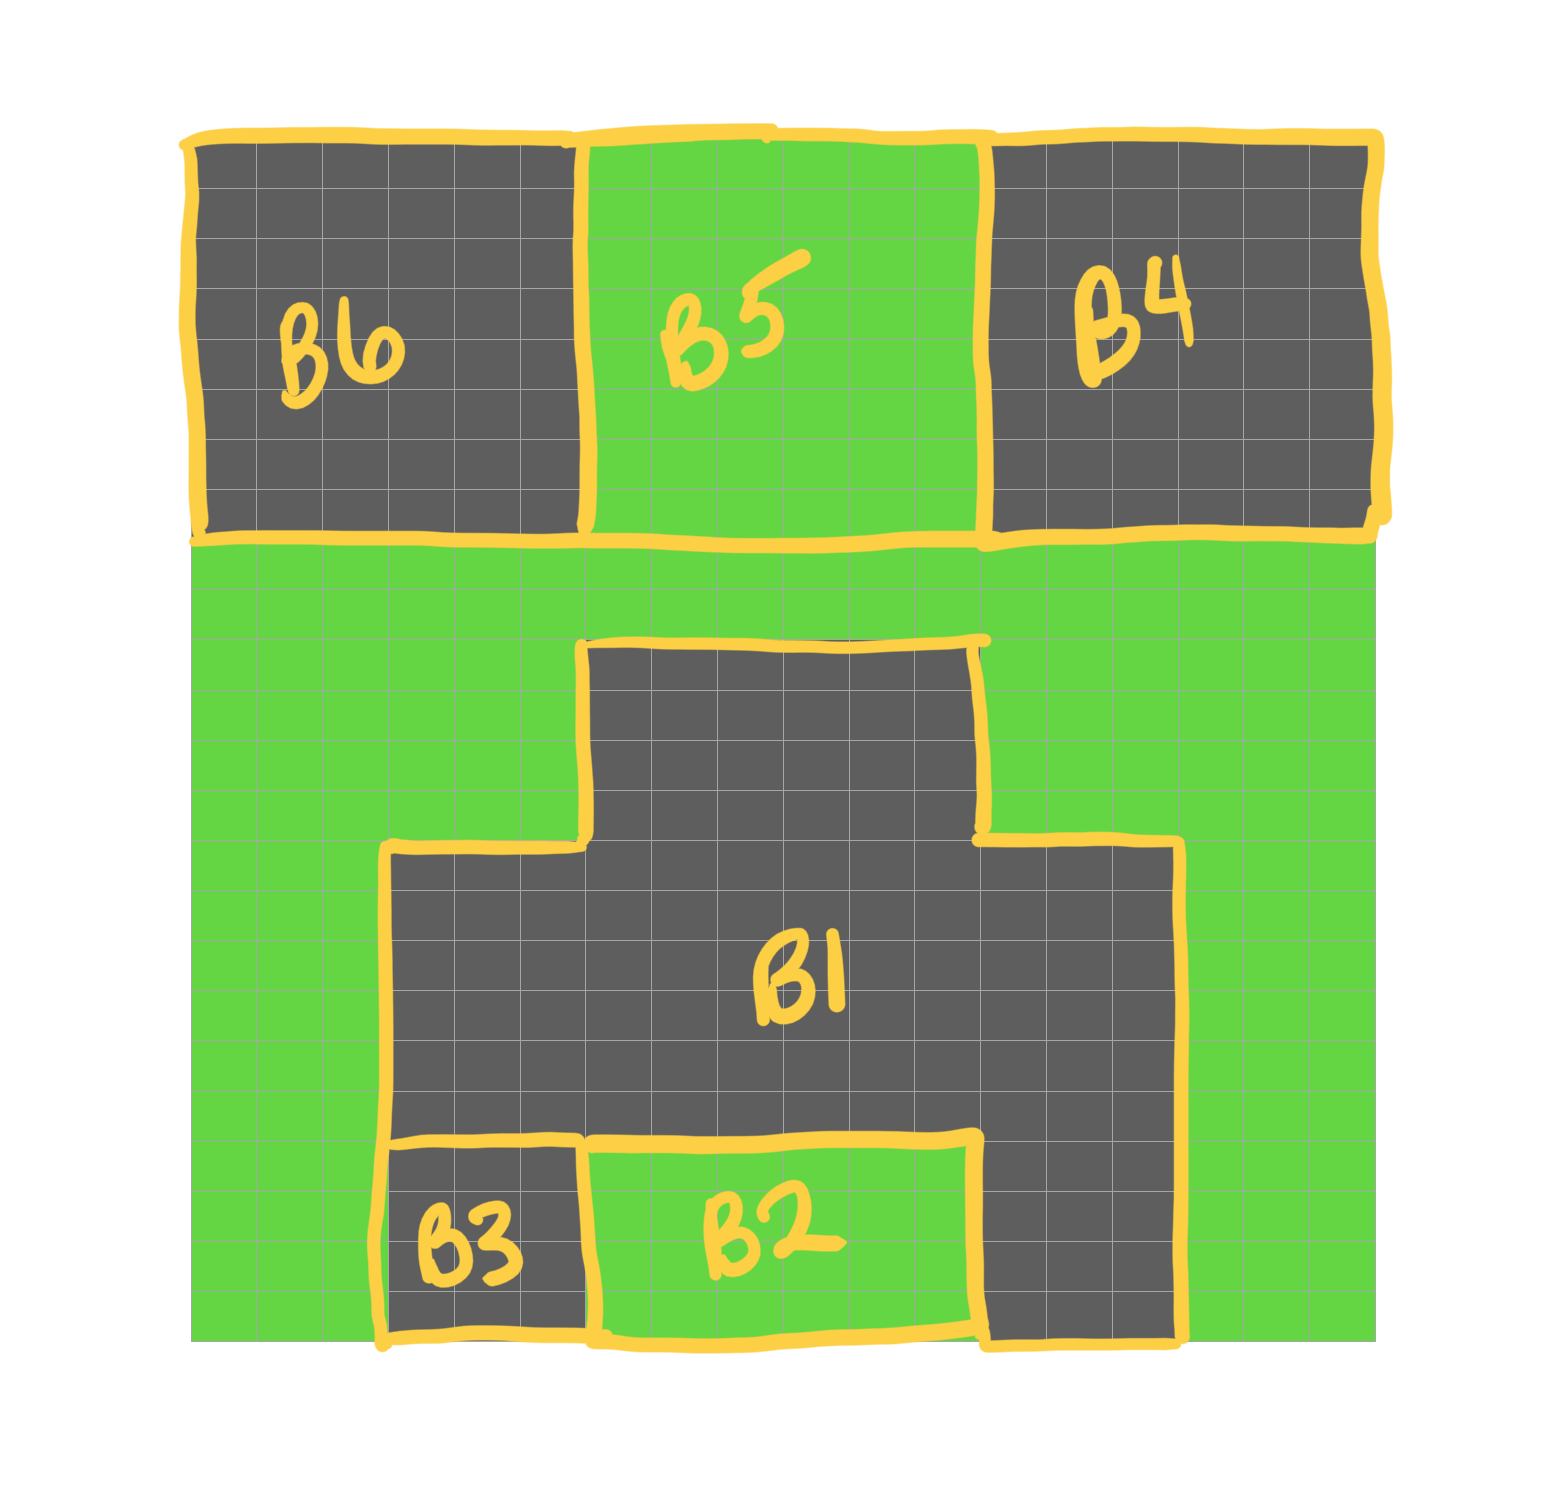 Figure 2: Blocks or bobbin groups
Blocks 1 and 4 can come from the CC skein. For the rest of the blocks I’ll need to make some bobbins (blocks 2, 3, 5, and 6). At least 1 inch of yarn per stitch is a safe bet, especially since there will be a bunch of twists and I’ll need some extra for the tails.
- Block 2: 24 stitches (green)
- Block 3: 12 stitches (black)
- Block 5: 48 stitches (green)
- Block 6: 48 stitches (black)
The trick for this piece will be how/where to do the turns, either on the right block edges or the left. I have to double back somewhere, without the incoming stitch to join to. Luckily, this post on ExplaiKnit has an answer to the problem. I must create a large loop when I make it to the left side of the motif (see paragraph 8: “The other method…”).
Working the Pattern
Let’s get started. The hat will start with 2K2P ribbing, requiring using a multiple of 4 stitches. I cast on 104 stitches, for a head that is 21 inches around. Join to work in-the-round and do 3 rows black (plus the cast on row is a total 4 black rows) then 4 rows green. 2 more rows of just Knit with green… and it’s time for the motif.
The motif is 18 stitches wide, so I have put stitch markers at 52±9 = 43 and 61 (where stitch 1 and 104 are the join/seam at the back of the hat). I knit green to my marker, the start the motif:
3K MC
3K CC (using yarn from CC skein)
6K MC from bobbin
3K CC from bobbin
Now for the magic. Hold your piece upside down and untangle all the bobbins / skeins. Still holding the piece upside-down, push knitted piece into the circle so that it appears right-side-up but inside-out. Just like a flat piece, you are looking at the wrong side, now we purl! Following the instructions from ExplaiKnit, take the green skein (it should be 18 stitches back from your current point) and make a very big loop to bring it over to the left side of your work. Lay the MC yarn over the CC yarn from the bobbin (to catch the MC yarn in the CC yarn) and then:
3P CC from bobbin
6P MC from bobbin
3P CC from skein
P using the MC yarn that forms the big loop until you're all the way around and back at the motif!
Once you’ve worked your way back around, pull the MC through (so there is no longer a big loop). Flip your work inside out again (so that it is right-side out). We start again, knitting all the way around, working the motif, flipping the piece inside out, making the big loop, purling the motif, and finally purling all the way around.
Finishing
I’ve decided to end the hat quite abruptly. 2 rows K in green after the motif is complete, then a very sharp decrease. Repeating until you run out of stitches:
- 1 round K2tog every 8th sts (losing 13 sts per round)
- 1 round just K.
All done. You can check out my project page on ravelry if you’d like more details.
Comments
Comments are sent directly to me and may or may not be posted for display on this page.